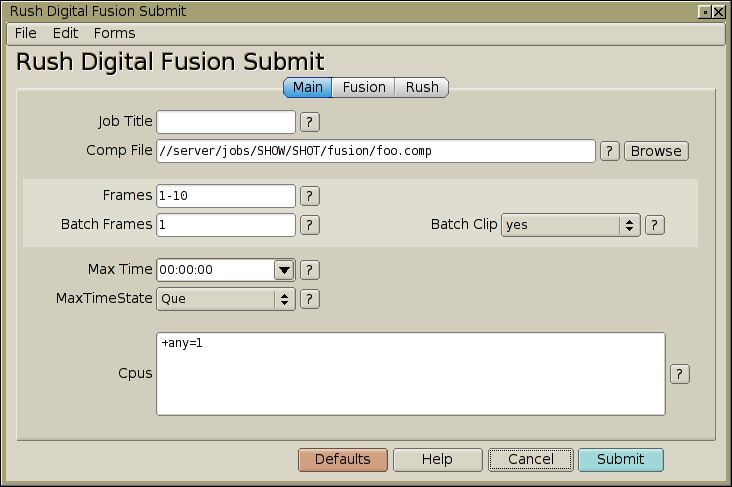

This should have already been set up by your sysadmin, or the person who installed the rush software:
This script will be executed not only by the user to bring up the submit-fusion GUI, but it will also be executed on all the render machines to run the renders.
To ensure the renders run with the proper environment, you'll need to modify these lines at the top of the script:
###################################################################
### DIGITAL FUSION SPECIFIC VARIABLES -- CUSTOMIZE AS NECESSARY ###
### See df documentation for more info.                         ###
###################################################################
if ( $G::iswindows )
{
    # WINDOWS
    $ENV{PATH} = "C:/Program Files/Fusion 5.1 Render Slave;".	# 5.1
		 $ENV{PATH};

    # FUSION LICENSE SERVER
    #    Uncomment and change as needed.
    #
    # $ENV{EYEON_LICENSE_FILE} = '@somehost;';			# FUSION LICENSE SERVER
    # $ENV{EYEON_LICENSE_FILE} = "C:/FLEXlm/dfusion.dat";       # ..OR LICENSE FILE
}
|
Fusion (and any plugins you use) may also depend on other variables; you can define them similarly.
Be sure the shortcut points to a copy on a file server, and not to local files in c:\rush\examples (windows) or /usr/local/rush/examples (unix).
Should be as simple as clicking on your desktop shortcut.
If you prefer using a terminal window, be sure to run the script with an absolute UNC path, eg:
perl //server/jobs/rushscripts/perl/submit-fusion.plIf you don't run it with an absolute path, the frames will fail because rush didn't have the absolute path to the submit script.
The interface should pop up. If it doesn't, verify (unix) the first line in the script's path points to the correct location of your perl binary, or (windows) the '.pl' extension is configured to correctly invoke perl.
Click the help button (buttons with '?') for any field you want to know more about.
When the GUI pops up, note there are separate tabs; "Fusion" for fusion-specific command line options, and "Rush" for Rush-specific controls.
For the "Comp File:" prompt you can either type the pathname, or navigate to your .comp file using the Browse button. If it is your first time submitting, you may have to manually type in the //server/volume name in the browser in order to get a directory listing that you can then navigate through.
Avoid using mapped drive letters (z:/yada/yada) your project, to avoid problems with drive maps, eg. when people log out, drive maps disappear.
This is the range of frames you want to render; normally two values separated by a dash, eg. '1-100'.
You can also specify individual frames, multiple ranges, or cobinations of both, eg. '1 10 20-30 400-900', which would render frames 1, 10, 20 through 30, and 400 through 900.
This will render the comp in 5 frame chunks, ie. rendering 5 frames per execution of the renderer. This helps speed up rendering by limiting the number of times Fusion has to start up.
In our case, lets use any 5 available cpus at the lowest priority:
+any=5@1
If you want to pass special command line flags to Eyeon's 'consoleslave' command line tool, you can do this under the "Fusion" tab at the "Render Flags:" prompt. Anything you type there will be inserted verbatim as options on consoleslave's command line.
For more info, see consoleslave's documentation
This should submit your job, and a window indicating the jobid should pop up, followed by an irush interface with the jobid already set to the new job.
The next time you bring up the submit form, it will have all the values set from the last execution. Note that you can then save this as a form so you can easily recall it later.
For more info on the irush interface, see the irush tutorial.
Hit 'Frames' in irush to watch the progress of your job.
If some frames are running, or got done already, click on
some, and hit 'Logs' to see the output of the perl commands
you entered.
When you're finished with the job, hit 'Dump' in irush.